Module 01 – the shoe rack
We start small, but first we have to deal with the building material cardboard. Therefore we try out how it is to create individual boards of cardboard and to glue them together with specially made side walls to form a module. In the case of cardboard, we asked a car repair shop for large boxes of windscreens. They did not have these, but they had plenty of other cardboard boxes. We made sure that it was corrugated cardboard and consisted of at least 1.5 layers. The more layers the cardboard has, the more stable it is. There are also differences in the thickness and stability of the side plies. There are boxes, where the outer cover feels similar to a board, it is harder to press in the box with your finger. But in order not to waste too much time in finding the right and perfect boxes, we strengthen them ourselves with clever frames and several layers.
The side walls consist of several corrugated cardboard discs, which we glue together with hot glue. It also worked with wood glue, but with hot glue it takes only a few seconds until the discs are glued together. The boards for the bottom, lid and intermediate bottom of the module are more complex to make. Here we cut the surfaces out of the cardboard with the cutter and fill in a stable construction with about 3cm for the small and 5-8cm for the large modules. This construction resembles a honeycomb pattern and consists of many individual strips (see module 03 [link will be added] ). These strips are attached in a grid pattern, the long side corresponds to the longer side of the module. Thus the moment is absorbed by the structure and a more stable module is created. These strips are glued to the surface about 3-6cm apart and cross-strips are placed between them. The cross-strips ensure that the longer strips do not bend over and thus bend the board. The more cross and longitudinal strips there are, the more stable it becomes.
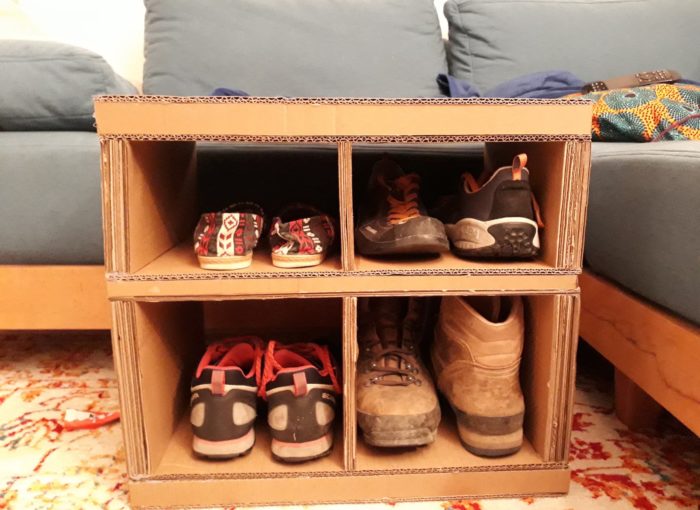
Then the boards are glued together with the sidewalls and a small module is created, just big enough to fit our shoes. The whole thing still needs to be taped with packing tape to seal the slits, make the look a little more closed and increase the stability even more. Here we are very tidy, after all this also serves to seal against moisture. Only if the masking is done cleanly, the surfaces can be sealed and closed with the paint. In the end, we painted the module so that it becomes resistant to moisture and no longer looks like cardboard. But more about this in the following articles about the modules.


Used Tools
- Cutter
- Hot glue gun
- lineal of metal
- bricklayer angle
Used Materials
- Cardboard
- Tape
- Hot glue gun patrons
- Varnish